Bore, Rain, Well and General Use Water ...
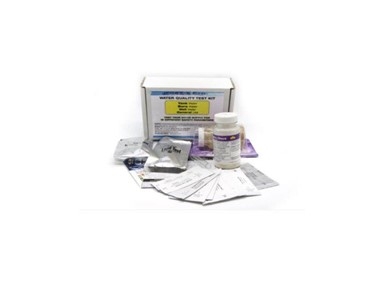
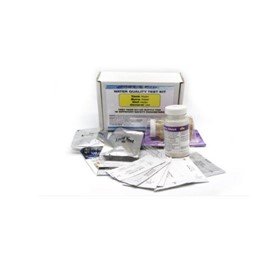
The inexpensive Bore Water, Rain Water, Well Water, and General Use Water Quality Test Kit allows you, in a few simple steps, to determine if your water contains harmful or undesirable levels of bacteria, lead, copper, iron, pesticide, free chlorine, hydrogen sulphide, chloride, nitrate, nitrite, sulphate, pH, total alkalinity, total chlorine and hardness.
Product Details
Water Quality Test Kit, 15-Parameters,
Kit Includes:
Recent water contamination of our town water and also concerns about copper and lead poisoning due to unsuitable faucets and lead based solder have highlighted concerns about safety of our water supply.
Lead can enter drinking water when service pipes that contain lead corrode, especially where the water has high acidity or low mineral content that corrodes pipes and fixtures. The most common problem is with brass or chrome-plated brass faucets and fixtures with lead solder, from which significant amounts of lead can enter into the water, especially hot water.
Homes built before 1986 are more likely to have lead pipes, fixtures and solder. The Safe Drinking Water Act (SDWA) has reduced the maximum allowable lead content – that is, content that is considered “lead-free” – to be a weighted average of 0.25 percent calculated across the wetted surfaces of pipes, pipe fittings, plumbing fittings, and fixtures and 0.2 percent for solder and flux.
In adequate backflow prevention has caused cases of gasto and other waterborne diseases .Within distribution systems there exist points called cross-connections where nonpotable water can be connected to potable sources. These cross-connections can provide a pathway for backflow of nonpotable water into potable sources. Backflow can occur either because of reduced pressure in the distribution system (termed backsiphonage) or the presence of increased pressure from a nonpotable source (termed backpressure). Backsiphonage may be caused by a variety of circumstances, such as mainbreaks, flushing, pump failure, or emergency firefighting water drawdown.
Don’t risk it – test your water supply on a regular basis.
Before You Begin
1. Contents:
– One Bacteria Test Vial
– One Lead / Pesticide Test Packet
– One Nitrate / Nitrite Test Packet
– One pH / Hardness / Chlorine Test Packet
2.Keep tests out of reach of children or pets. Do not ingest anything from this test kit. Do not drink water sample used for testing.
Store and use at room temperature (60-86 F).
Do not use on hot water or water containing bleach detergents. Do not re-use any part of the test kit.
3. Do not open packets or vial until you are ready to perform the tests.
4. Read and follow all instructions carefully.
Bacteria Test Instructions
1. Take out the Bacteria Test vial and set upright on a flat surface.
2. Collect water sample or turn on tap to a very slow stream.
3. Carefully twist off cap and fill vial to 1/2 inch below the top (to 5 ml line). DO NOT OVERFILL and DO NOT SPILL the bacterial growth powder in the vial.
4. Replace cap and twist on tightly. Shake the vial vigorously for 20 seconds.
5. Place the capped vial upright in a warm area (70-90 F) where it cannot be disturbed for 48 hrs.
6. After 48 hrs., observe the color of the liquid without opening the vial:
Purple Color: Negative Result (No bacteria were detected).
Yellow Color: Positive Result (It is highly likely that potentially harmful bacteria were detected).
7. For positive results, add bleach to the sample before pouring down the toilet, then wash hands carefully. Negative samples may be poured directly into the toilet. Discard vial in the trash.
Lead / Pesticide Test Instructions
The Watersafe Lead Test can detect dissolved lead at levels below the EPA Action level of 15 parts per billion (ppb). The Watersafe Pesticide Test detects two of the most common pesticides used in the US at or below the EPA Maximum Contaminant Level (atrazine – 3 ppb, and simazine – 4 ppb).
1. Open Lead / Pesticide packet and take out all contents. The packet contains a test vial, a dropper pipette, two Watersafe test strips, and a desiccant (to be discarded).
2. Using dropper, place exactly TWO dropper-fuls of water sample into test vial. To pick up the sample, tightly squeeze the bulb at the end of the dropper and place the open end into the water sample. Release the bulb to pick up the sample, then squeeze again to expel the sample into the vial.
3. Swirl vial gently for several seconds. Place on a flat surface.
4. Place both test strips into the test vial, with arrows pointing DOWN.
5. Wait 10 minutes. Do not disturb strips or vial during this time. Blue lines will appear on the strips.
6. Take the strips out of the vial and lay them on a flat surface with the arrows pointing to the LEFT.
Read Results.
If you only see the LEFT line (next to number 1), the test is negative)
Negative: The LEFT line (next to number 1) is darker than the RIGHT line (next to number 2)
Positive: The RIGHT line (next to number 2) is darker than the LEFT line (next to number 1), or lines are equally dark (Both LEFT and RIGHT lines are equally dark
7. Note: If no lines appear, or both lines are very light, the test did not run properly and the result is not valid.
If a test strip shows a positive result, your water sample may contain lead or pesticides at a toxic level.
Nitrate / Nitrite Test Instructions
1.Carefully open Nitrate / Nitrite Test packet and take out test strip.
2. Immerse the reagent pads into water sample for 2 seconds, remove, after 1 minute match colours with the chart below.
3. Colours are stable for 1 minute.
pH | Hardness | Chlorine Test Instructions
1. Carefully open pH/ Hardness/ Chlorine Test packet and take out strip.
2. Immerse the reagent pads into water sample and remove immediately. Hold the strip level for 15 seconds.
3. Match pH, Total Hardness and Total Chlorine pads (in that order) to the colour chart.
To contact Pacific Water Technology about Bore, Rain, Well and General Use Water Quality Test Kit (15 Tests) use Get a quote.
Thanks for your help!
Sorry! Unable to submit your request at this time. Please try again later.
Report this product