Locally, the Australian battery industry contributes approximately $1.3 billion of annual GDP and supports more than 6000 jobs. We are one of the highest producers of raw materials such as lithium and other critical metals for battery manufacturing. However, these materials were shipped and processed overseas to produce battery-grade materials which were then exported back to Australia. This extra step has surged the price of locally-made batteries. It would be more economical to outsource battery manufacturing to countries with cheaper workforces specializing in this technology with the current situation.
Government initiative to boost local manufacturing capabilities has promoted battery manufacturing to accelerate the deployment of renewable energy future. This behaviour has seen a surge of interest in bringing battery technology manufacturing locally. Bringing the manufacturing home also provides more opportunities for local employment and supports the local economy. The feasibility of local manufacturing relies on our capability to reduce manufacturing costs while maximizing energy storage density and operating life.
A fully-automated, precision manufacturing system to streamline production will bring down the manufacturing cost and make the technology market competitive. Optimising battery production requires sensors to monitor measurement tasks during production such as during electrode manufacturing, assembly and forming processes.
The critical control parameter in battery manufacturing is film thickness, wet layers and coatings on the electrodes. Manufacturers must meet these specifications per their customer requests while optimizing production yield and minimizing waste. Still, manufacturers have faced several measurement challenges to ensure they can reliably meet these standards.
An inline measurement system is a practical approach used for continuous measurement in the manufacturing environment. It can allow the control system to alter the processing parameters to bring the thickness back to the acceptable range if it deviates from the specification limit.
Factors to Consider in Thickness Measurement
A key factor to consider in designing inline thickness measurement systems is to select products based on the required system’s accuracy. The performance of the measurement systems can be affected by various factors such as environmental influences, errors, and sensor accuracy. Combining these factors will create a significant measurement error if manufacturers select products based on the product accuracy alone.
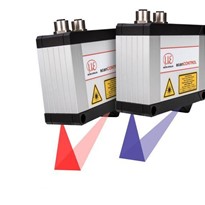
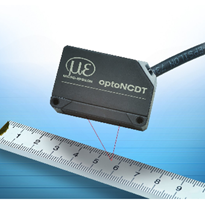
Optical laser displacement sensors are used to design an industrial thickness measurement system. At least two laser sensors are required and they must be installed directly opposite one another in perfect alignment. This configuration ensures both sensors measure at the exact position of the object as the slight degree of misalignment in the sensor position can produce reasonable measurement errors. This error will amplify if the target moves in the measurement field.
In addition, it is also crucial to synchronize both laser sensors for them to perform the measurement simultaneously and at the exact opposite of each other. If synchronization does not occur, it will produce erroneous results as each sensor will measure at different timelines. This setting is highly prone to measurement errors due to micro-vibration or conveyor belt movement. Each sensor has a slightly different linearity that varies by the percentage of its measuring range.
Now that the challenges in the measurement systems are addressed, manufacturers still need to consider the best technique to mount the sensors as the mounting frame must be isolated from any source of vibration to achieve stable and reliable measurement. The mounting bracket must be made from materials with minimum thermal expansion to minimize the movement of sensors due to the temperature variation.
Some address the source of errors. An integrated automated thermal compensation was implemented to eliminate the errors due to the expansion of materials. Regular calibration of sensors can be performed to minimize the non-linearity errors.
Non-contact displacement measurement sensors such as single point laser and confocal sensors provide high resolution and precision measurements that can measure the slightest deviations down to nanometer resolution. Confocal displacement systems can also offer high-speed measurement with ultra-high precision up to sub-nanometer resolutions.
Measurement of Other Parameters in Battery Applications
Combining over 40 years of industrial experience, engineers at Bestech Australia provide rich expertise in high precision testing applications. Not only thickness measurement, but we also offer technologies that enable reliable measurement of edge, gaps, profile, and physical parameters such as temperature, pressure and many more. These operating parameters should be precisely controlled and monitored to optimize the manufacturing process.
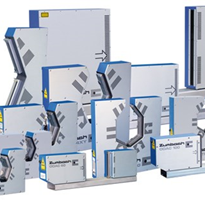
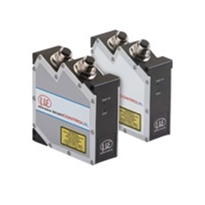
For example, optical laser profile scanners can measure the edge curvature and deformations on the edge of the coating film during the cutting process. They can also be used to inspect the quality and uniformity of the coating process to detect undulations or defects.
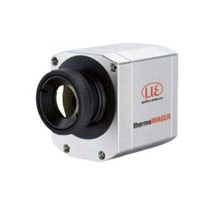
Continuous thermal monitoring during the initial charging and discharging of batteries is crucial to understanding the temperature distribution inside the cell to identify faults such as short-circuiting. Non-contact sensors such as thermal imaging cameras or pyrometers are best used for temperature measurement tasks in a production environment. The measurement does not interfere with the process, enabling easy control and integration. Thermal imagers can also provide multiple measuring fields simultaneously and can be integrated with the control system to activate control response if the measurement exceeds the set limit values.


.jpg)

-160x160-state_article-rel-cat.png)



-160x160-state_article-rel-cat.png)
-160x160-state_article-rel-cat.png)




-160x160-state_article-rel-cat.png)


-205x205.jpg)
